Thursday 30 January 2014

MyMy Mei Tai


A couple weekends ago I finally was able to whip up my new Mei Tai and I'm quite pleased with how it turned out!
I made it reversible to suit mood, outfit, and me vs. hubby. One side is a pretty aqua chevron, with the other a charcoal grey with white birds. I love that this will also work for carrying boys or girls (future baby maybe!?).

I followed a great tutorial by Anitra over at Pigs Pancakes and Knitting Needles. It's the style of a Babyhawk Mei Tai, and it is pretty darn comfy!
I like it a bit better for front carries since It doesn't hug Fin as close to me as I'd like. I also made it a bit too short for my crazy long baby. D'oh!
 
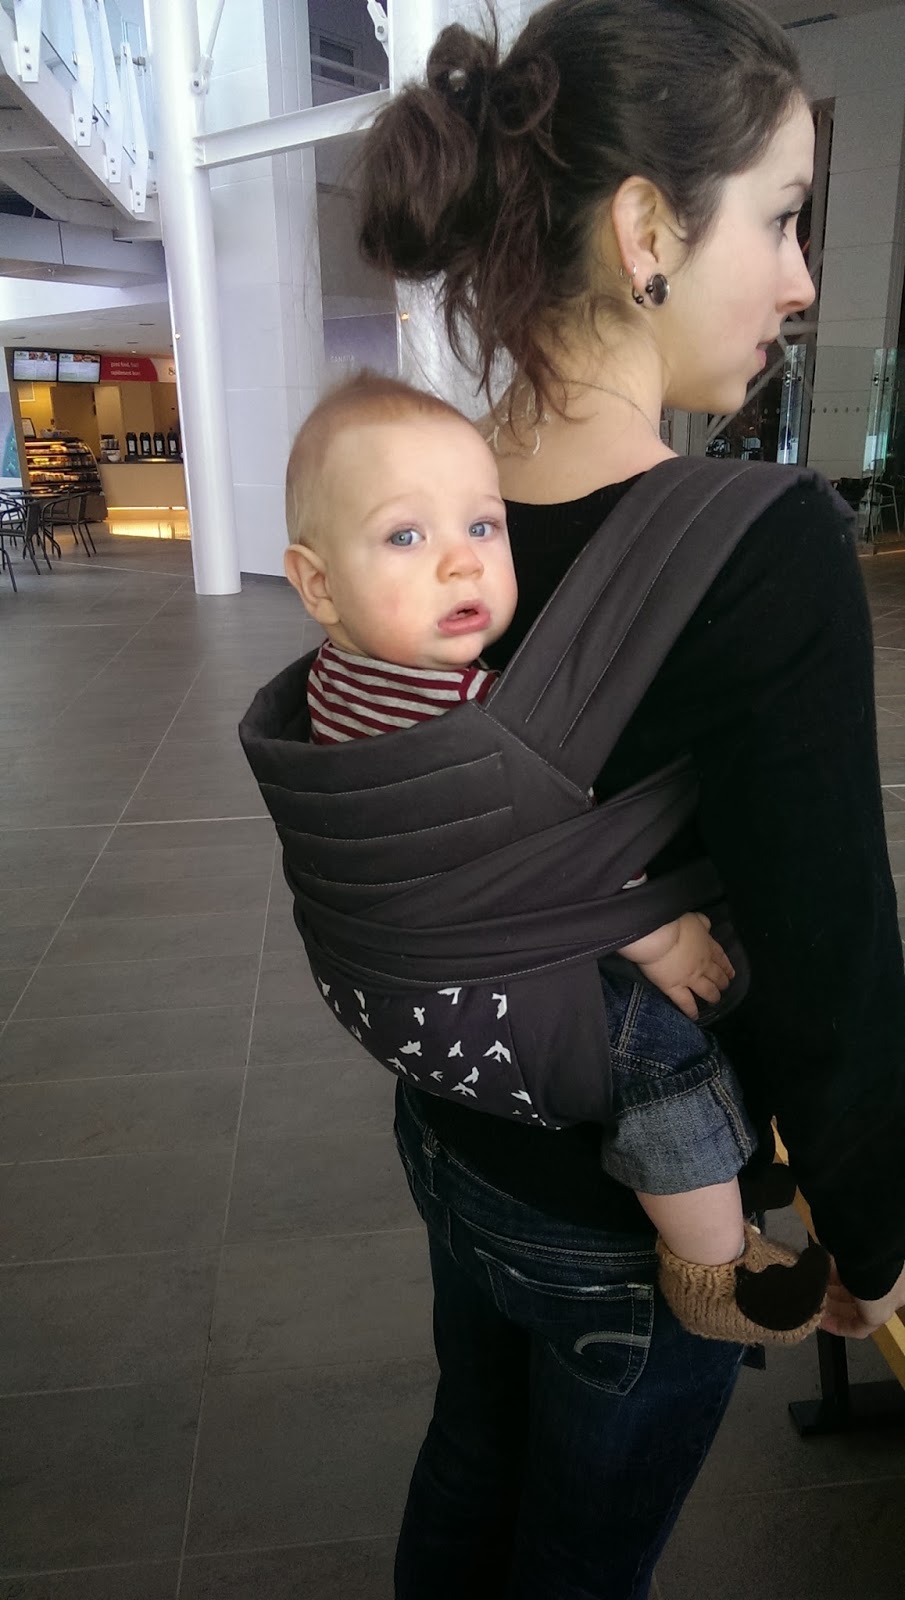
We had our first test run at the Aviation Museum, and this is what I quickly discovered. Once Fin fell asleep his head was flopping back (as you can see below)! I'm glad the top of the body piece is padded since it was able to support his neck enough when it tipped back. (Don't worry I didn't leave him like that!)
Luckily, I can make a pretty quick fix - a hood! I have a good amount of both fabrics leftover so I think i'll make a nice hood that I can snap on. Problem solved!
So if you don't have loads of money to spend on a fancy baby carrier or woven wrap, I definitely recommend making yourself a Mei Tai. If you're new to babywearing, or interesting there's lots of great info out there. Here's a short list of some of the benefits of wearing your baby.

To add to the list, my three favorite reasons to babywear are:
*you get lots of sweet snuggles
*you can cook dinner hands free, and
*you don't have to fight with fitting a stroller through stores or small spaces!

Happy sewing (and hopefully babywearing)!
Eryn


Thursday 23 January 2014

Kombucha Craze


One of my favourite beverages is Kombucha. Not only is it oh so delicious, but it has so many health benefits!
First, what is Kombucha you might ask. It's a sweetened tea that’s been fermented by a symbiotic colony of bacteria and yeast (a SCOBY, a.k.a. “mother” because of its ability to reproduce, or “mushroom” because of its appearance).
Now back to those health benefits! One of kombucha’s greatest health benefits is its ability to detox the body. It is rich in many enzymes, vitamins, amino acids, anti-oxidants and bacterial acids which promote a healthy liver and cancer prevention. Kombucha is fantastic for treating arthritis because it is rich in glucosamines which helps preserve cartilage structure and prevent joint degeneration. Kombucha can reduce inflammation which will benefit any part of your body, but also fibromyalgia, depression, etc. 

You can't forget that Kombucha is a probiotic beverage! That natural fermentation of the sweetened tea allows the bacteria to grow and produce the nutrients needed for the health benefits listed above. Probiotics have been the biggest part of the long journey I took to heal my digestive system, and I feel everyone can benefit for them!

And the greatest part is how simple it is to make your own Kombucha at home! You just need to make sure all your equipment is sterile,wait, and then enjoy all those health benefits.

Here is the recipe I always use:

Kombucha

1 Gallon purified water
8 tea bags, organic green or black tea
1 cup cane sugar
1 cup previous batch kombucha
1 mother scoby

*Bring water to a boil then remove from heat.
*Add sugar and stir to dissolve. Let the water cool for about 5 minutes, then add your tea bags, steep for 15 minutes and remove tea bags. Now cover the pot and let it cool to room temperature (I usually do this before bed so it can cool over night).
*Once your sweet tea mixture has completely cooled add in your kombucha and scoby. Never use metal utensils when handling kombucha and especially your scoby and it can damage the bacteria needed for your fermentation.
*Cover with cheese cloth making sure no bugs can get it (fruit flies are your worst enemy!). Let ferment for 1-4 weeks.
*Remove your mother scoby, a the new daughter scoby as well (if there is one). Strain through cheese cloth if you wish to remove all the little 'wispy bits' (I like to leave them since its beneficial bacteria, but Colin prefers it strained).
*Bottle your kimbucha for a second fermentation. This will make it nice and fizzy! I like to bottle it in sterilized Grolsh flip top bottles. I love to add chopped fresh ginger to half my bottles and let it ferment with the ginger. Allow at least a few days to week for the second fermentation.
*Drink as is, or diluted in water or juice. Enjoy!


Cultures for Health is an amazing website if you're interested in fermenting! They are such great a resource with recipes, directions, supplies, FAQs, troubleshooting, etc. I highly recommend you check it out! Here is there page for kombucha. It has everything you need to know to get started!

Friday 17 January 2014

This and That

I'm very excited to be almost done the Chevron Forest quilt! I was really hoping to be done by now, but I hit some snags in the quilting process and am still doing a bunch of stitch ripping.
Luckily, the stitch ripping almost done and then I can wrap it up with the binding!

Aside from having a teething baby on my hands, I managed to get a good start on my Mei Tai for Fin!
All the pieces are cut out and the two shoulder straps are done! I didn't take in progress pictures since they were finished late last night and the photos would have been no good, so I'll be sure to get some for you next time.

The project next in line is to finally finish Colin's Star Wars quilt!
Sorry for the night time photo (I told you, no good!), but here is my R2D2 so far. So many little pieces to applique on! Once that's done, I'll be outlining them in embroidery. So.Much.Embroidery. But it'll all be worth it. Oh yes. 

I have the front and back pieced...
And the embroidery on the back is almost done. Oh I can't wait to get this puppy together!

Another thing i'm pretty excited about is this...
Kombucha! It's been ages since I've done a batch and my stock is just about empty. It's fermenting a little slow due to the colder weather, but it's making some good progress (especially since my scoby was a little old).

Check in next time and I will have directions and tips for making Kombucha yourself!


Thursday 9 January 2014

Gone Bananas


One of my favorite treats that my mom made me when I was growing up was Banana Bread. It was always worth staying up late to wait for it to come out of the oven. All warm, moist and delicious with some butter spread over to melt into all the little pockets making it even more moist and delicious. I'm drooling just thinking about it!

Once going gluten free, that banana bread was one of the things I missed the most. So I got the recipe from my mom and started experimenting with making it gluten free. And now, I've mastered it! It comes out super moist and fluffy every time!
It's because of this bread that you will always find bananas in my freezer! I buy extra with my groceries and let them get all spotted, then pop them in the freezer. When it's time to make some banana bread, I put the bananas in a bowl to thaw. Usually over night is perfect, since I've found that having the bananas room temperature makes for better bread! Freezing the bananas, then thawing them also gives this recipe more liquid, so I'm not sure how the bread would turn out if fresh bananas were used. If you try, let me know how it works!
 Without further ado...

Banana Bread

5 very ripe bananas, frozen then thawed
2 large eggs
1/2 cup softened coconut oil
2 cups Gluten Free All purpose flour*
1/2 cup Muscavado sugar (coconut sugar works nicely as well)
1 tsp baking soda
1/2 tsp Xanthan gum

Optional add ins:
1/2 cup Chocolate chips, walnuts, dried fruit, etc.

*Preheat oven to 350°F. Lightly grease a 4 x 6.5 bread pan (or line it with parchment paper...that's what I do)
*Mix the bananas, eggs and coconut oil on medium speed in a stand mixer until light and fluffy, about 1 or 2 minutes. This will help make the bread rise nice and high. If you don't have a stand mixer, you can try using a hand mixer!
*Add in the flour, sugar, baking soda & xanthan gum. Mix on low until all ingredients are combined. Scrape down sides if needed. Add any additional ingredients (like chocolate chips or walnuts, yum!) now.
*Pour batter into bread pan and 'slice' down the middle with a knife. This will make the bread rise evenly, though it doesn't look like it does much when its still just batter.
*Bake for about an hour on the middle rack. Use a toothpick to test the center at the end of that hour. If some batter comes up with the toothpick, bake for another 5 -15 minutes.
*Transfer to a wire rack to let cool. Slice and serve once loaf has mostly cooled (it may break apart easier when slicing if its too hot).

Enjoy!
Eryn

Saturday 4 January 2014

Chevron Forest

Another week just flew by! Did anyone else catch it? I sure didn't.

Today I am happy to share a finish with you! Well a quilt top, but i'm counting it!
My best friend had her first baby just before Christmas! A boy! She asked me to make a quilt for her new little squish so we picked out fabrics to match the nursery, which is a really cute forest theme.

The fabrics we chose (from left to right) are Riley Blake Camp a Lot Firewood Chocolate, Kona Solids Lime & Green Tea,  Riley Blake Camp a Lot Chevron Yellow, and Kona Solid White.

On a side note, can I just say how cute the Camp a Lot line is? I definitely need to snatch up some of it before it starts selling out. I really want to get the panel and then make a quilt we can take camping and use around the camp fire!
This is my first chevron quilt and I'm really happy with how it's coming along so far.  I have the binding all cut up, so hopefully tonight I can finish that tonight. It's going to be so lovely backed with some Dimple dot Minky in a nice chocolate brown. Would it be too ambitious to try and get it basted tonight as well?

(sleep Fin, sleep!)

Alrighty folks, back to the sewing machine while Fin's still napping!

Eryn